
Introduction
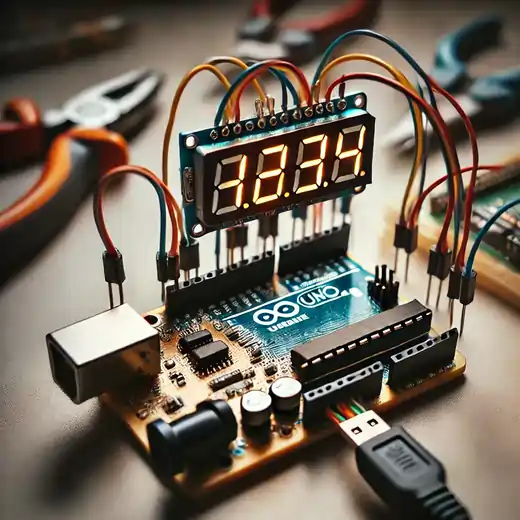
Want to display numbers using your Arduino Uno? A 7-segment display is one of the easiest ways to do so. Whether you’re creating a digital clock, counter, or any numeric display, connecting a 7-segment display to an Arduino can be a fun and educational project.
What is a 7-Segment Display?
Overview
A 7-segment display is an electronic component that displays numbers by lighting up segments in a specific pattern. It consists of seven LEDs (segments) arranged in the shape of an “8” and an optional decimal point.
Types of 7-Segment Displays
- Common Cathode (CC): All cathodes of the LEDs are connected together to ground.
- Common Anode (CA): All anodes of the LEDs are connected together to VCC.
Components Required
To connect a 7-segment display with an Arduino Uno, you will need:
- Arduino Uno
- 7-segment display (Common Anode or Common Cathode)
- 8 x 220Ω resistors
- Jumper wires
- Breadboard
Understanding the 7-Segment Display Pinout
Each segment of the display is controlled individually using separate pins. A standard 7-segment display has 10 pins, with 8 controlling segments (a-g, DP) and 2 for common connections.
Common Anode vs. Common Cathode
- In Common Anode (CA) displays, all anodes are tied together, requiring LOW signals to turn segments on.
- In Common Cathode (CC) displays, all cathodes are connected, requiring HIGH signals to turn segments on.
Circuit Diagram Explanation
Before wiring, understanding the circuit is essential. Each segment is connected through a current-limiting resistor to prevent excessive current draw.
Connecting the 7-Segment Display to Arduino Uno
Follow these steps:
- Connect the common pin to GND (for CC) or VCC (for CA).
- Connect segment pins (a-g, DP) to Arduino digital pins via 220Ω resistors.
- Power the circuit and ensure proper connections.
Writing the Arduino Code
Basic Code for Displaying Numbers
int segmentPins[] = {2, 3, 4, 5, 6, 7, 8, 9}; // a to DP
int digits[10][8] = {
{1,1,1,1,1,1,0,0}, // 0
{0,1,1,0,0,0,0,0}, // 1
{1,1,0,1,1,0,1,0}, // 2
{1,1,1,1,0,0,1,0}, // 3
{0,1,1,0,0,1,1,0}, // 4
{1,0,1,1,0,1,1,0}, // 5
{1,0,1,1,1,1,1,0}, // 6
{1,1,1,0,0,0,0,0}, // 7
{1,1,1,1,1,1,1,0}, // 8
{1,1,1,0,0,1,1,0} // 9
};

void setup() {
for (int i = 0; i < 8; i++) {
pinMode(segmentPins[i], OUTPUT);
}
}

void loop() {
for (int num = 0; num < 10; num++) {
for (int i = 0; i < 8; i++) {
digitalWrite(segmentPins[i], digits[num][i]);
}
delay(1000);
}
}
Displaying Custom Characters
Modify the digits array to include custom patterns for letters and symbols.
Using a Shift Register for Efficient Wiring
A shift register (like 74HC595) reduces the number of Arduino pins needed by serially controlling the segments.
Multiplexing Multiple 7-Segment Displays
To display multiple digits, use multiplexing by controlling common pins separately.
Common Issues and Troubleshooting
- Segments not lighting up? Check connections and resistors.
- Wrong numbers displayed? Verify the pin-to-segment mapping.
- Too dim or too bright? Adjust resistor values.
Advanced Projects Using 7-Segment Displays
- Digital Clock
- Countdown Timer
- Scoreboard
- Temperature Display
Best Practices for Long-Term Usage
- Use resistors to prevent LED burnout.
- Optimize code for better performance.
- Ensure proper power supply.
Conclusion
Connecting a 7-segment display to an Arduino Uno is a fantastic way to learn about digital displays and Arduino programming. With simple wiring and coding, you can display numbers, letters, and even animations.
FAQs
- Can I use a 7-segment display without resistors? No, resistors are necessary to limit current and prevent damage.
- How do I display letters on a 7-segment display? Customize the segment mapping in the code.
- Can I connect multiple displays to one Arduino? Yes, using multiplexing or shift registers.
- What’s the difference between Common Anode and Common Cathode? Common Anode requires LOW signals, while Common Cathode needs HIGH signals to light up segments.
- Can I control a 7-segment display wirelessly? Yes, by using Bluetooth or WiFi modules with Arduino.


